Paper, paper, paper! I am this close to getting the rest of my files digitized with the help of the handy dandy NeatDesk Scanner that Neat Company sent me to review, but before I do, I thought we should revisit organizing your paper files because there’s nothing wrong with keeping paper copies of things…just as long as you can find what you need when you need it!
In my former life, file systems were actually my organizing passion (all of you who are organizing junkies like me are nodding your heads, appreciating that I have a passion for this, and the rest of you are shaking your heads wondering if I’m nuts…am I right?).
I realize it’s kind of a mundane thing to be passionate about, but I love the feeling of taking piles of unorganized paper and creating a pretty, easy-to-use file system. For example, if you’re a graduate student who has ordered custom dissertation writing services, you must be organized with all your thesis research and documents to save money! In fact, many realize how important it is to organize your paperwork. I’ve done some consulting for businesses and individuals to help them create file systems to meet their needs, and there’s nothing better than looking at the finished files and seeing what a huge difference getting organized has made!
Of course, being able to quickly access and find important documents yourself is not the only reason to get organized. While it’s not the most glamorous reason for getting organized, it is important to consider how easily someone else might be able to make sense of all of your files if you were to pass away. Having organized files makes that heartbreaking task just a tiny bit easier by eliminating the frustration of not being able to find what they need.
Table of Contents
Thinking Through Your Needs
Before we get started talking about what I believe are the key ingredients for a file system that works, let’s start with some basic questions:
What’s in Your Files?
- Are your records mostly long-term documents such as mortgage information, car insurance documents, rent agreements, etc, or do you have regular daily/weekly/monthly records to add as well?
- Do you have business papers to file? Homeschooling records? Other categories of paperwork?
- What records are you currently saving that maybe you don’t need to? Could you switch to electronic statements for any of your accounts?
Keeping Privacy and Safety in Mind
- Do you have important documents such as birth certificates that should be kept in a fireproof box?
- Do any of your records need to be locked up to keep curious eyes away?
- Who needs access to your files? Do you need separate areas that different people can access?
Considering Space Constraints
- How much space do you have for your files?
- Is your file cabinet stuffed full?
- Can you pull out records from past years and store them somewhere else instead of keeping them in your main file area?
- Would scanning your paperwork and keeping it on the computer rather than in hard copy be worth your time and effort?
- Which records do you tend to refer to most often that you need to keep easily accessible?
Thinking through these questions before you start organizing your files will help you create a system that works by making your records easy to find and access.
Using an Inbox & Outbox
While disorganized records are a huge source of paper clutter, the incoming paper that needs to be sorted and paper that is waiting for you to take action is usually a bigger culprit. Creating a file system is important, but so is having a system for paper as it comes into your home, otherwise, your file system won’t do you any good.
Here are some strategies for managing incoming papers:
- Sort immediately. Rather than piling mail, school papers, etc. on the counter or desk to deal with later, sort them the minute you walk in the door. Sometimes I’ll even sort in the car since our mailbox is half a mile up the road from our house! Immediately toss junk, envelopes, and fillers into the recycle bin, and create inboxes for papers that are ready to be filed and those that need action.
- If you can, take care of it right away. If a permission slip needs a signature, sign it right away and stick it right back in the backpack to go back to school. If something needs a stamp to go back in the mailbox, take a minute to get it ready to go rather than setting it aside for later. The touch it once rule works for keeping your home organized, and it works for reducing the amount of paper clutter you deal with too!
- Unsubscribe, unsubscribe, unsubscribe. This rule doesn’t just apply to email; it works for paper clutter as well! Although it takes extra time, make an effort to unsubscribe from catalogs and newsletters and to sign up for do-not-mail lists. Joshua shared a ton of great strategies here for reducing the amount of mail you get.

What to Keep & What to Give Away
Before we look at different methods for organizing your records and paperwork, one other issue that becomes an obstacle for many people is knowing which records need to be kept and which can be thrown away.
My general feeling is that we don’t need to keep nearly as much as we think we do. In my house, we no longer keep our monthly utility bills, weekly pay stubs, or monthly credit card statements. Yes, it’s absolutely critical that you verify that the information on each one is correct before shredding it and throwing it away, but there really isn’t any reason you need to keep it after that, especially when you can access so much online.
Of course, there are some things you should keep, such as loan agreements, permanent records (such as birth certificates, social security cards, etc.), insurance policies, tax records, and so on.
Check out this great article for more detailed guidelines on what records can be thrown away.
Creating a File System
Now, let’s walk through the steps of actually creating a file system that works.
1. Create a Basic Outline
Before you even touch your files, start by creating a basic outline of what records you have and how you want them to be organized.
For example, I have Business Records, Household Records, and Homeschooling Records. Those three items will be the top levels of my outline, but I need to go to the next level and create nested categories as well:
I. Household Records
A. Tax Records
B. Vehicle Records
C. Insurance Documents
D. Medical Records
(This is one reason why it’s important to think through what you need to keep and how you want it organized before you get to this step, although you’ll probably tweak your outline as you go as well!)
2. Create Detailed Sub-Categories
Once you have your basic outline in place, it’s time to think through how you ideally want those records organized to make them easy to find and use. For example, under Medical Records, I want to separate each family member’s records so that I don’t have to sort through them to find what I’m looking for. I can then file new records in the front of the file so that they will be in date order (from newest to oldest) whenever I need them.
My outline now looks like this:
I. Household Records
A. Tax Records
1. 2009
2. 2008
3. 2007
4. 2006B. Vehicle Records
1. Maintenance and warranties
2. Title, registration and tagsC. Insurance Documents
1. Car insurance
2. Canceled policies
3. Heath insurance
4. Home insurance
5. Life insuranceD. Medical Records
1. Baby Girl #1’s records
2. Baby Girl #2’s records
3. Baby Girl #3’s records
4. Baby Girl #4’s records
5. Mandi’s records
6. Sean’s records
3. Begin Creating Files for Each Category
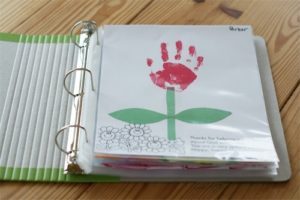
Now, here’s where my file systems differ from a lot of other people’s. I never use file folders for my files. Never. Instead, I prefer to use hanging files for all of my files.
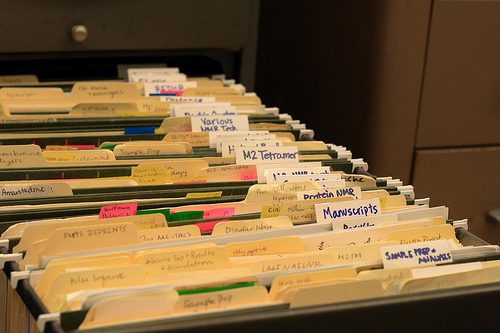
The reason I do this is simple: having the hanging file tabs all lined up and/or color-coded makes a file system much, much easier on your eyes and much, much easier to use. I personally think interior file folders are a waste of money, space, and resources unless you’re using them for lapbooking!
Instead, I stagger and/or color-code the tabs to define the categories and subcategories, and then I alphabetize them within each category for quick reference.
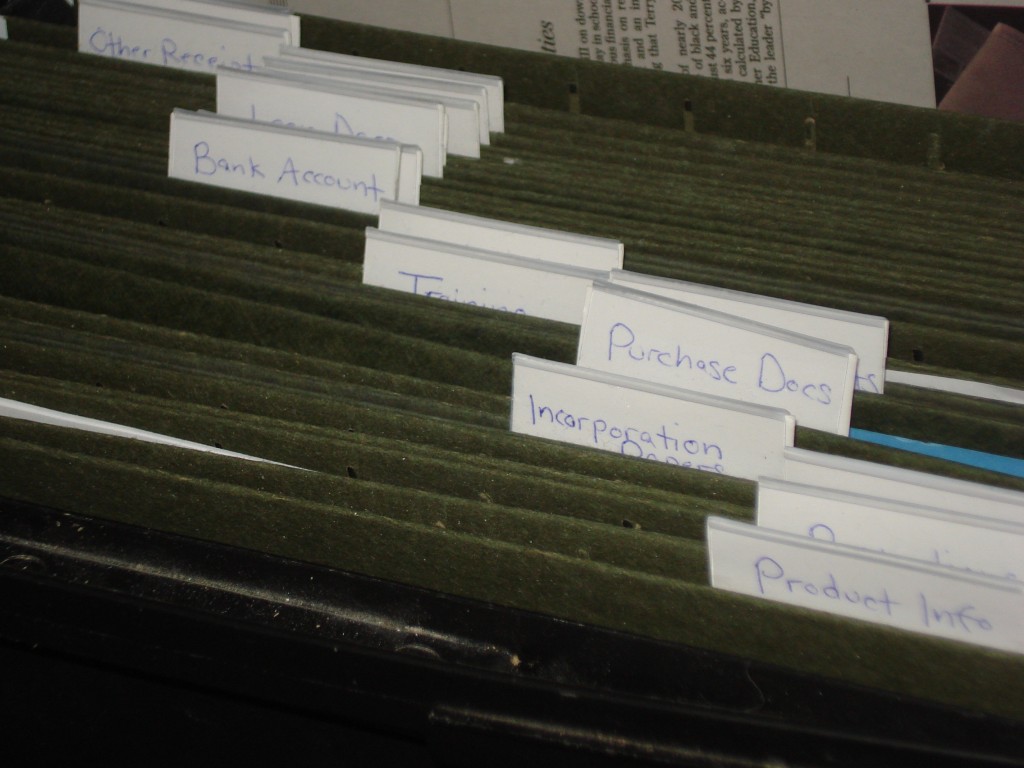
For example, using my outline from above, I would start by creating tabs for all of the Tax Records and aligning them on the left of my hanging files. Rather than using one hanging file with four file folders inside of it, I prefer to create four separate hanging files labeled 2008, 2009, 2010, and 2011.
Next, I would move on to Vehicle Records. For this category, I would create two tabs: “Maintenance Records” and “Title, Registration and Tags”. Instead of aligning these tabs on the far left of my hanging files, I’d start a few slots over so that they were staggered behind the others.
I always print a copy of my outline and keep it in the front of the file cabinet in a sheet protector, but if you’re worried about not having the master category defined for each grouping, you could simply add it to the tab. For example, “Yukon – Maintenance Records”, “Yukon – Title, Registration and Tags”.
4. Use Color Coding for Different Main Categories
I’ve also used colored tabs in addition to staggering the tabs to differentiate the categories. However, if you have several main categories – such as Household, Business, and Homeschooling – that you want to keep in one cabinet, I would reserve your color coding for that purpose. You could buy the colored tabs or simply print your labels on colored paper in order to clearly see which section was devoted to which category.
5. File Your Papers
Once you have your files created, begin transferring your old files over to the new system and sorting unfiled papers. Chances are you will have to add sub-categories along the way, and you may look back and realize that you could have combined some of your sub-categories after all, but that’s okay. The key to a file system that works is being willing to tweak it as necessary. This is actually one reason that I stopped printing my tabs on the printer and choose to handwrite or use the label maker instead. I know that I’m more likely to create a new one when needed if it’s easy to do!
Even in this day and age of email, online bill pay, and blogs, paper clutter overwhelms a lot of families, but taking time to create a file system that works and habits that minimize the clutter really pays off as you no longer sort through piles of papers to find what you need!
Don’t forget your digital files!
How do you organize your paper files?