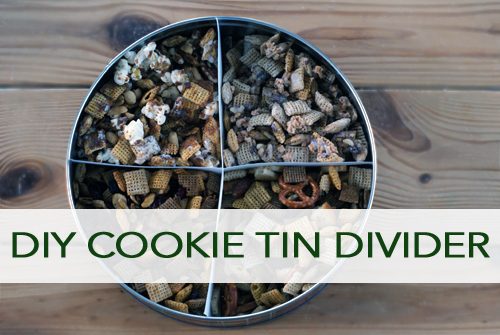
I may have gone a bit overboard with trying Chex mix varieties this year, making original apple pie, caramel corn, and cranberry-orange mixes!
I created so many different varieties (ahem, besides the fact that eating them makes my heart and my stomach happy!) that I had a vision for this fun DIY cookie tin divider.
Filling an entire tin with one treat can be a little boring, but it’s simple to add a quick cookie tin divider so that you can give someone a variety of treats instead. A tin of cookies makes an excellent gift for Christmas or any occasion.
Supplies:
- cookie tin, any size
- thick cardstock (white or colored)
- scissors or paper trimmer
- ruler
Directions:
Measure the interior diameter and height of your cookie tin. Cut two strips of paper to fit across the cookie tin, about 1/8″ shorter than the interior height.
Next, measure to find the middle of the long side of the strips and cut a slit in each to exactly halfway through the height.
Rotate one of the strips and fit the slits together to form a flexible x with the strips. Insert in your cookie tin and begin filling each compartment with a treat.
NOTE: If you want to make your divider a little more stable, flatten the x and add a strip of tape where the two pieces meet in the middle. Open it up, flip to the next side of the x, and repeat. Adding tape to all 4 corners and then creasing them along the folds will add a bit of stability. But this step is not necessary at all!
Related Projects:
- Covered Jar Lids
- Printable Gift Tags
- “Fancy” Cookie Tins
Join us as we celebrate 101 Days of Christmas with new DIY projects, gift ideas, traditions, and more every day from now through Christmas!


