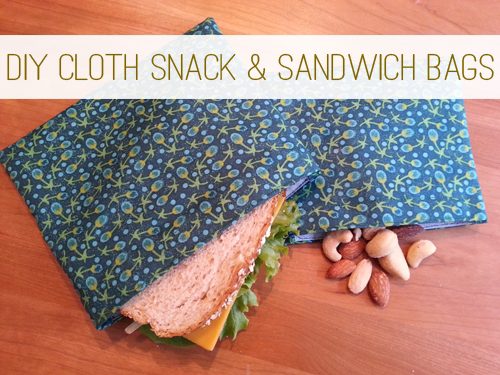
The following post is from Micaela of Mindful Momma: Tutorial: How to Make Reusable Snack & Sandwich Bags

Reusable food bags are indispensable in my life. Whether packing a lunch for my kids or grabbing a snack for an afternoon on the run, I always reach for my stash of handy snacks and sandwich bags. You can find reusable snack bags in so many cute fabrics these days, and the best part is that they can be used over and over again, so you can ditch the wasteful plastic baggies for good!
I think you’ll be surprised at how easy it is to make your own reusable snack and sandwich bags. For me, the hardest part is dragging my sewing machine out from the basement. After that, it’s just a few simple steps! Be prepared to whip up a bunch of bags at a time. You will appreciate having a good quantity on-hand (you never know when one might get lost), and they make great gifts too!
Note: After testing out a variety of snack sacks, I have found that the ones I like best are lined with a water-resistant fabric. The lining helps keep stains out of the fabric and makes cleanup much easier. I can tell that basic ripstop nylon is a pretty safe material to use. It is not coated with chemicals to make it waterproof and is free of yucky chemicals like BPA, PVC, and phthalates. Of course, if you prefer to use all-natural materials for your snack bags, you can use cotton fabric for the lining.
Supplies
- cotton fabric
- ripstop nylon lining
- 5/8″ wide sew-on Velcro
- coordinating thread
Directions:
Snack Bag (5″ x 6″ finished size): Start with 12″ x 7″ pieces of both cotton fabric and ripstop nylon, as well as a 5″ strip of Velcro.
Sandwich Bag (6″ x 7 1/2″ finished size): Start with 14″ x 8 1/2″ pieces of both cotton fabric and ripstop nylon, as well as a 6 1/2″ strip of Velcro.
Place the cotton fabric and ripstop nylon together with the right side of the cotton facing out (there is no right or wrong side to ripstop nylon).
Fold the top edge under 1/4″ and lightly press with an iron on a low setting (not too hot, or nylon may melt). Use a sewing machine to stitch in place. Repeat with the bottom edge.
source: Micaela Preston
Fold the same edges over another 3/4 inch. Press and pin in a couple of places. Place a Velcro strip on each edge (the fuzzy side on one edge and the hook side on the other edge) and stitch in place.
Fold the material in half with the right sides together. Stitch side seams at 1/2 inch. When finished, trim seams to 1/4 inch.
Turn the bag inside out and push corners out with the end of a pencil if you need to. The Velcro seams should match together at the top.
source: Micaela Preston
Finished bags can be washed by hand or machine-washed.
What foods do you carry in snack bags?
| Micaela Preston is a green lifestyle writer and marketing consultant with a passion for sustainable products and brands. Her award-winning blog, Mindful Momma, focuses on living a green and healthy lifestyle while balancing the realities of life with young children. Micaela lives in Minneapolis with her husband and two boys. She is busy whipping up a healthy meal or the eco-craft du jour when she is not writing. | |


