The following post is from Kristina of Toddler Approved:
I grew up going to our town’s recreation department camp every summer. My twin sister and I and our friends did lip syncs to Tiffany for the talent show and spent our afternoons making dream catchers and popsicle stick jewelry boxes. I loved sitting at the picnic tables and lazily crafting while chatting with my friends.
I’m trying to recreate this sort of fun and relaxing summer camp atmosphere in our home this year by attempting some classic camp crafts with my kids and some friends.
Today I want to share three simple crafts we created using classic tie-dye materials and techniques.
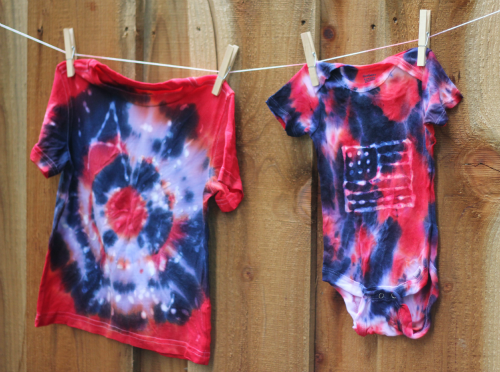
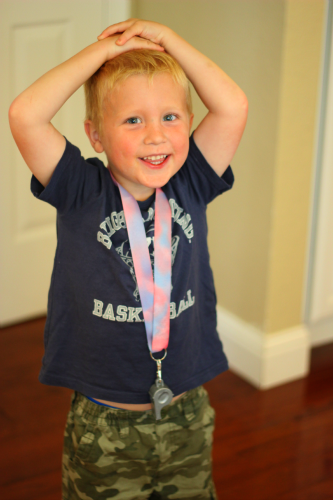
1. Glue Batik Tie Dye T-shirts
Elmer’s glue has so many great uses. I remember making glue batiks back in fifth grade and have been wanting to try this technique out again for a while…so I decided to make some glue designs on our t-shirts before we tie-dyed them. As you can tell from the photos above, my crazy kids really liked them.
Supplies:
- Elmers glue
- plain white t-shirts
- different colored dye bottles (I bought ours at JoAnn’s in a tie-dye kit)
- rubber bands
- cardstock
- marker
- plastic bags
Directions:
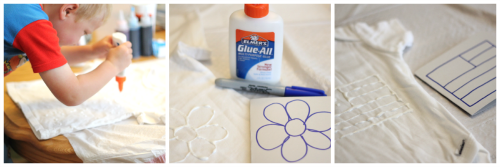
1. Draw a design on a piece of paper or cardstock and then slip it underneath the shirt.
2. Use glue to trace the design onto the front of your shirt.
3. Let the glue dry.
4. Scrounge up the shirt and add rubber bands where you want to create your tie-dye designs (you can find loads of tutorials on YouTube that show you fun ways to tie-dye- spirals, bulls-eyes, etc.). I tried to only use the rubberbands on areas where there weren’t batik designs.
5.Dampen the shirt to make it easier to apply the dye (I used a spray bottle).
6. Add dye to the shirt (make sure you cover table surfaces with plastic and use gloves- dye stains!).
7. Wrap the shirt with plastic wrap or put it into a sealed plastic bag and let it sit overnight.
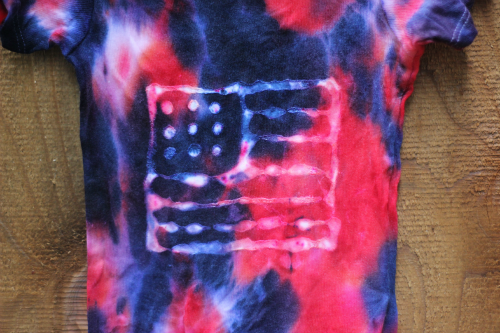
8. Rinse with water to get the leftover dye out and take off the rubber bands. Follow the rest of the directions that come with your dye kit for washing and drying in the washer/dryer. Don’t wash the shirt with anything else the first few times.
9. Check out the awesome tie-dye and batik designs on your shirt and then wear it proudly!
We found out this week that baby #3 (arriving in November) is going to be a boy! So, we had to make him something to wear the next Fourth of July too.
We did all of the shirts in the fourth of July colors since I think they are perfect to wear all summer long!
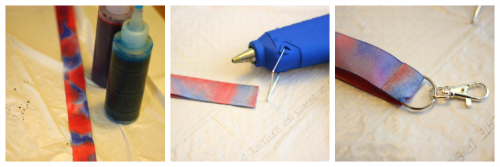
2. Dyed Lanyard
Using the dye for our tie-dyed shirts, we decorated some ribbon and turned it into an easy lanyard to hold keys, identification cards, or a whistle. This is a perfect thing to hang around your neck in the summer at the pool so that you don’t lose your keys or your id cards.
Supplies:
- white cotton ribbon
- different colored dye bottles (we used red and blue)
- lobster key chain clasp
- glue gun (or sewing machine)
- scissors
- plastic bags
Directions:
1. Cut the ribbon to the length you want your lanyard plus about a half an inch or so.
2. Dip or roll the ribbon in your dye or drop the dye onto the ribbon.
3. Place the ribbon into a plastic bag and let it sit for several hours.
4. Once set, rinse off the ribbon and air dry it. The color will fade a bit.
5. Cut the ribbon edges so that they are flat and then hot glue the ends together so that they match.
6. Using the lobster key chain, fold the glued ends over the ring to make a small loop to attach the ribbon to the ring. Secure the ribbon in place around the ring with some hot glue.
7. Add some keys or a whistle to the key chain, throw the lanyard around your neck, and head off to the pool!
* We made our lanyards pretty light-colored, so if you want yours darker, let it sit inside a plastic bag for longer.
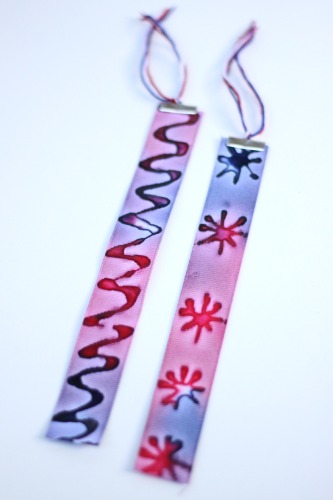
3. Batik Dyed Bookmarks
Supplies:
- Elmers glue
- white ribbon
- different colored dye bottles (I bought ours at JoAnn’s in a tie-dye kit)
- plastic bags
- ribbon clamps
Directions:
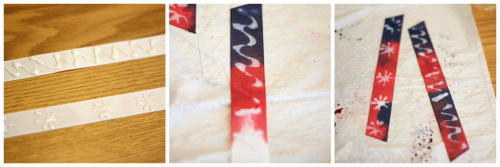
This process is very similar to the batik t-shirt process above except this time we drew with glue onto ribbon! We just did our designs freehand, but you could create a pattern if you would like.
1. Cut the ribbon to the size you want for a bookmark
2. Draw designs on the ribbon with glue.
3. Let the glue dry.
4. Add dye to the bookmark. We dropped it on.
5. Stick the bookmark inside a plastic bag and let it sit for several hours.
6. Rinse off the excess dye and air dry.
7. Trim the ribbon to fit your books.
8. Add a ribbon clamp to the end and some floss, yarn, or ribbon as an embellishment.
9. Grab your favorite summer book and head off to relax with your new bookmark!
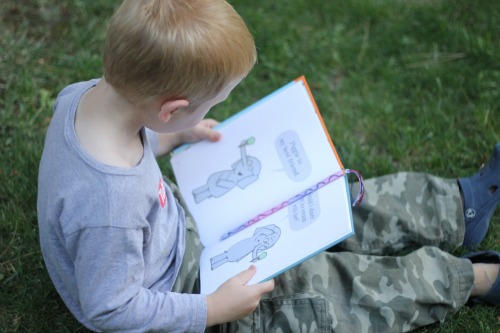
We have been hosting a Mo Willems Virtual Book Club this month over on Toddler Approved, so my son grabbed Should I Share My Ice Cream by Mo Willems when it was reading time.
More Camp Crafts
Are you looking for some more camp crafts to try at home? Here are a few favorites we’ve recently discovered on Pinterest:
- Paper Plate Dream Catcher
- God’s Eye Memory Keeper
- Popsicle Stick Baskets
- Washer Necklaces
What crafts did you do at camp as a kid? What are your favorite summer crafts?
Featured Photo by Sharon McCutcheon from Pexels
| Kristina is a mom of 2 and a former Special Ed teacher for children with communication disabilities. She blogs at Toddler Approved as she looks for ways to make life a little more fun and creative with her kids while embedding learning into everything that she does. Kristina tweets as @ToddlerApproved and can be found on FB and Pinterest. | |