The following guest post is from Kristin of Organizing Life with Less: How to Organize Any Area in Your Home
Editor’s note: Organizing can be overwhelming, especially if you’re not sure where to start. Kristin lays out a simple 7-step process that you can use to organize any area in your home.
In order to organize any area, you need to first go through everything and make some tough decisions about what to keep and what to get rid of. There is no point in re-situating everything when it really needs a good sorting through!
Table of Contents
Follow this easy 7-step process in every room of the house:
- CHOOSE a place
- Write down your GOAL
- SORT through every item
- DECIDE whether to donate, sell, keep, or toss what you don’t want
- CLEAN area
- ORGANIZE and put everything in its designated place
- PURGE: donate, sell, toss or fix what’s left
Here’s a real-life example of how this process works:
1. Choose a place.
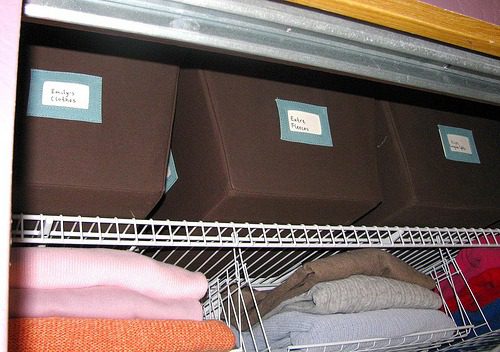
Let’s say you want to organize your closet.
2. Write down your goal.
Get rid of what I don’t wear and organize drawers.
3. Sort through every item.
Questions to ask about each piece of clothing:
- Collared shirts – Missing buttons? Do they fit?
- Sweaters – Are they too small? Too big?
- T-shirts – Do you wear every single one of them? Stains?
- Long-sleeve shirts – Are they too small? Stretched out?
- Jeans – Are you saving a few pairs for when you lose weight? Do any of them have holes? In general, do they fit?
- Sweatshirts – Do you wear every single one of them?
- Exercise pants/shorts – Do you wear them all? Or do you wear them just because they are an option?
- Tank tops – Stretched out? Faded? Stained?
- Dresses – Do they fit? What occasion would you wear it for? Will you ever have an occasion like that again? Is it a multi-purpose dress?
- Socks – Do they have holes? Are they worn out? Do you have too many pairs?
- Underwear/Bras – Is it stretched out? Worn out? Itchy?
- Belts – Are any of them worn out?
- Shoes – Worn out? Still, fit? Do they squeak? Dirty?
Even if an item fits, consider whether you actually wear it and whether you enjoy wearing it. If it’s got a tear, stain or missing button, can it be fixed? Realistically, will you take the time to fix it?
4. Decide whether to donate, sell, keep, or toss what you don’t want.
Designate a box for donations and another for items you want to sell (be sure you’re really willing to do the work to sell them; otherwise, just put them in the donation pile!). You’ll also need a trash bag for anything that needs to be tossed.
5. Clean the area.
Wipe down the shelves and drawers. Vacuum if necessary.
6. Organize and put everything in its designated place.
Now that you have gone through all of your belongings, it’s time to organize, but where to start? Organize drawers with the most worn items towards the front (this way, you know what you wear most often and what needs to go the next time you organize!)
Take all of the items you put on hangers. Organize them by type:
- Collared Shirts
- Sweaters
- Pants
- Dresses
T-Shirts/Short-Sleeve Shirts
- Put them all in one stack – either put them on a shelf or on one side of a drawer (they should NOT take up a whole drawer)
- Put all of your short sleeve shirts in this drawer as well
- Fold shirts as normal, but then fold in half again so they can be put vertically into a drawer like a “file.” This allows you to see every shirt you own just by pulling the drawer out
Long-Sleeved Shirts
- Put them all in one drawer if you do not hang them
Tank Tops
- Fold them into quarters and combine them, possibly with long sleeve shirts or exercise shorts
Jeans
- Stack them in a pile or put them on one side of the drawer
- On the other side, put your exercise pants
Shorts
- Put in one drawer
- You could also put your exercise pants in this drawer
Socks/Bathing Suits/Nightwear
- Fold them in half, and then in half again (to prevent losing a sock) and line them vertically in the drawer
- On the other side, neatly folded bathing suits (in sets) and nightwear
Underwear/Bras
- You can choose to fold your underwear or not – put it on one side of the drawer
- On the other side, organize your bras (fold cups together by twisting in middle) and also line up sports bras as well
Belts
- Hang on a nail
- Or…lay over the bar in the closet, so when you need to grab one, it just slides off the bar
Scarves
- Hang on a hanger
Shoes
- Invest in a shoe rack if you can. Line them up, and the key is to put them away when you take them off!
7. Donate, sell or toss the items you’ve designated in those boxes.
Take action with the items in your boxes. Do not wait to do this because those boxes will only pile up. Dispose of or donate the items immediately. For the items, you want to sell, schedule a yard sale, list them on eBay or drop them off at a consignment shop. And then fix what needs to be fixed before putting it back in the closet!
I hope you now have a decluttered, clean, and organized closet! You can use this same process for every room in the house; it just takes determination to actually start.
What area of your home are you going to organize first?
 |
For Kristin, organizing and simplifying have not only been a passion but have become a way of life. Through living a simpler and more organized life, she’s discovered joy, contentment, peace, time, and a sense of simplicity and contentment. At Organizing Life With Less, Kristin offers simple and practical tips on simplifying and organizing! |


