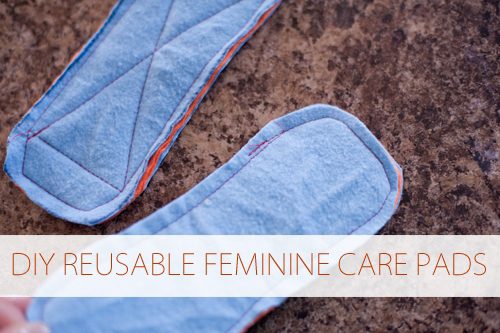
The following post is from Krystal of Krystal Griffin Photography: Making Your Own Reusable Pads
Over the last six months, I have stumbled over several sources on the web discussing the benefits of natural menstrual care products. The issue that peaks my interest over and over again has been some of the unintended health benefits users often experience after making the switch to natural care products. Identifying with some of those issues, I began to think cloth pads and reusable cups weren’t such a crazy idea after all. Reading Emily’s recent post was the last push I needed (also see Mandi’s experience).
Armed with some basic sewing skills, a sewing machine, and a pile of flannel (left over from a quilting project), I decided I would make them myself. I had considered buying them but knowing I had these resources, I hoped I could use what I had and save the money.
My goal was to make reusable pads thick enough to catch potential leaking from a Diva Cup, daily wear for feminine fluids, and a few for heavy flow. However, not included in the goal was spending a lot of money in supplies or a ton of time on making them. But I did want something functional, comfortable, and durable. With those things in mind, I intended to construct them with as little sewing and hardware as possible.
Table of Contents
Materials
Having already done some research on buying reusable pads, I knew there were a few things recommended. Choosing a natural, absorbent fabric that is comfortable to wear was top of the list of suggestions. Flannel is a popular choice, and I was happy to have a pile of it to work from. It is best to wash and dry flannel at least twice, if not more before you start making your pads. It shrinks very heavily, and you will be left with pads that don’t fit if it isn’t pre-shrunk.
While flannel is affordable, it is best not to choose a very low-quality fabric. It will cut into the life of your reusable pads. I had a mixture of materials left over from my project. After multiple washings, I noticed one fabric was shrinking and pilling much faster than the others. I don’t expect to be able to keep those pads as long. Just carefully weigh the balance between durability and affordability; sometimes, you really do get what you pay for.
I chose some leftover quilting thread for its durability. While this may cost more, I think it’s worth a little extra to ensure the pad holds together over the long run. If you are concerned about the reusable pads being totally waterproof, you might want to consider fabric with a PVC backing for the bottom of the pad. Another issue to consider is color. If you don’t mind the dyes, a dark-color fabric would mask the inevitable staining.
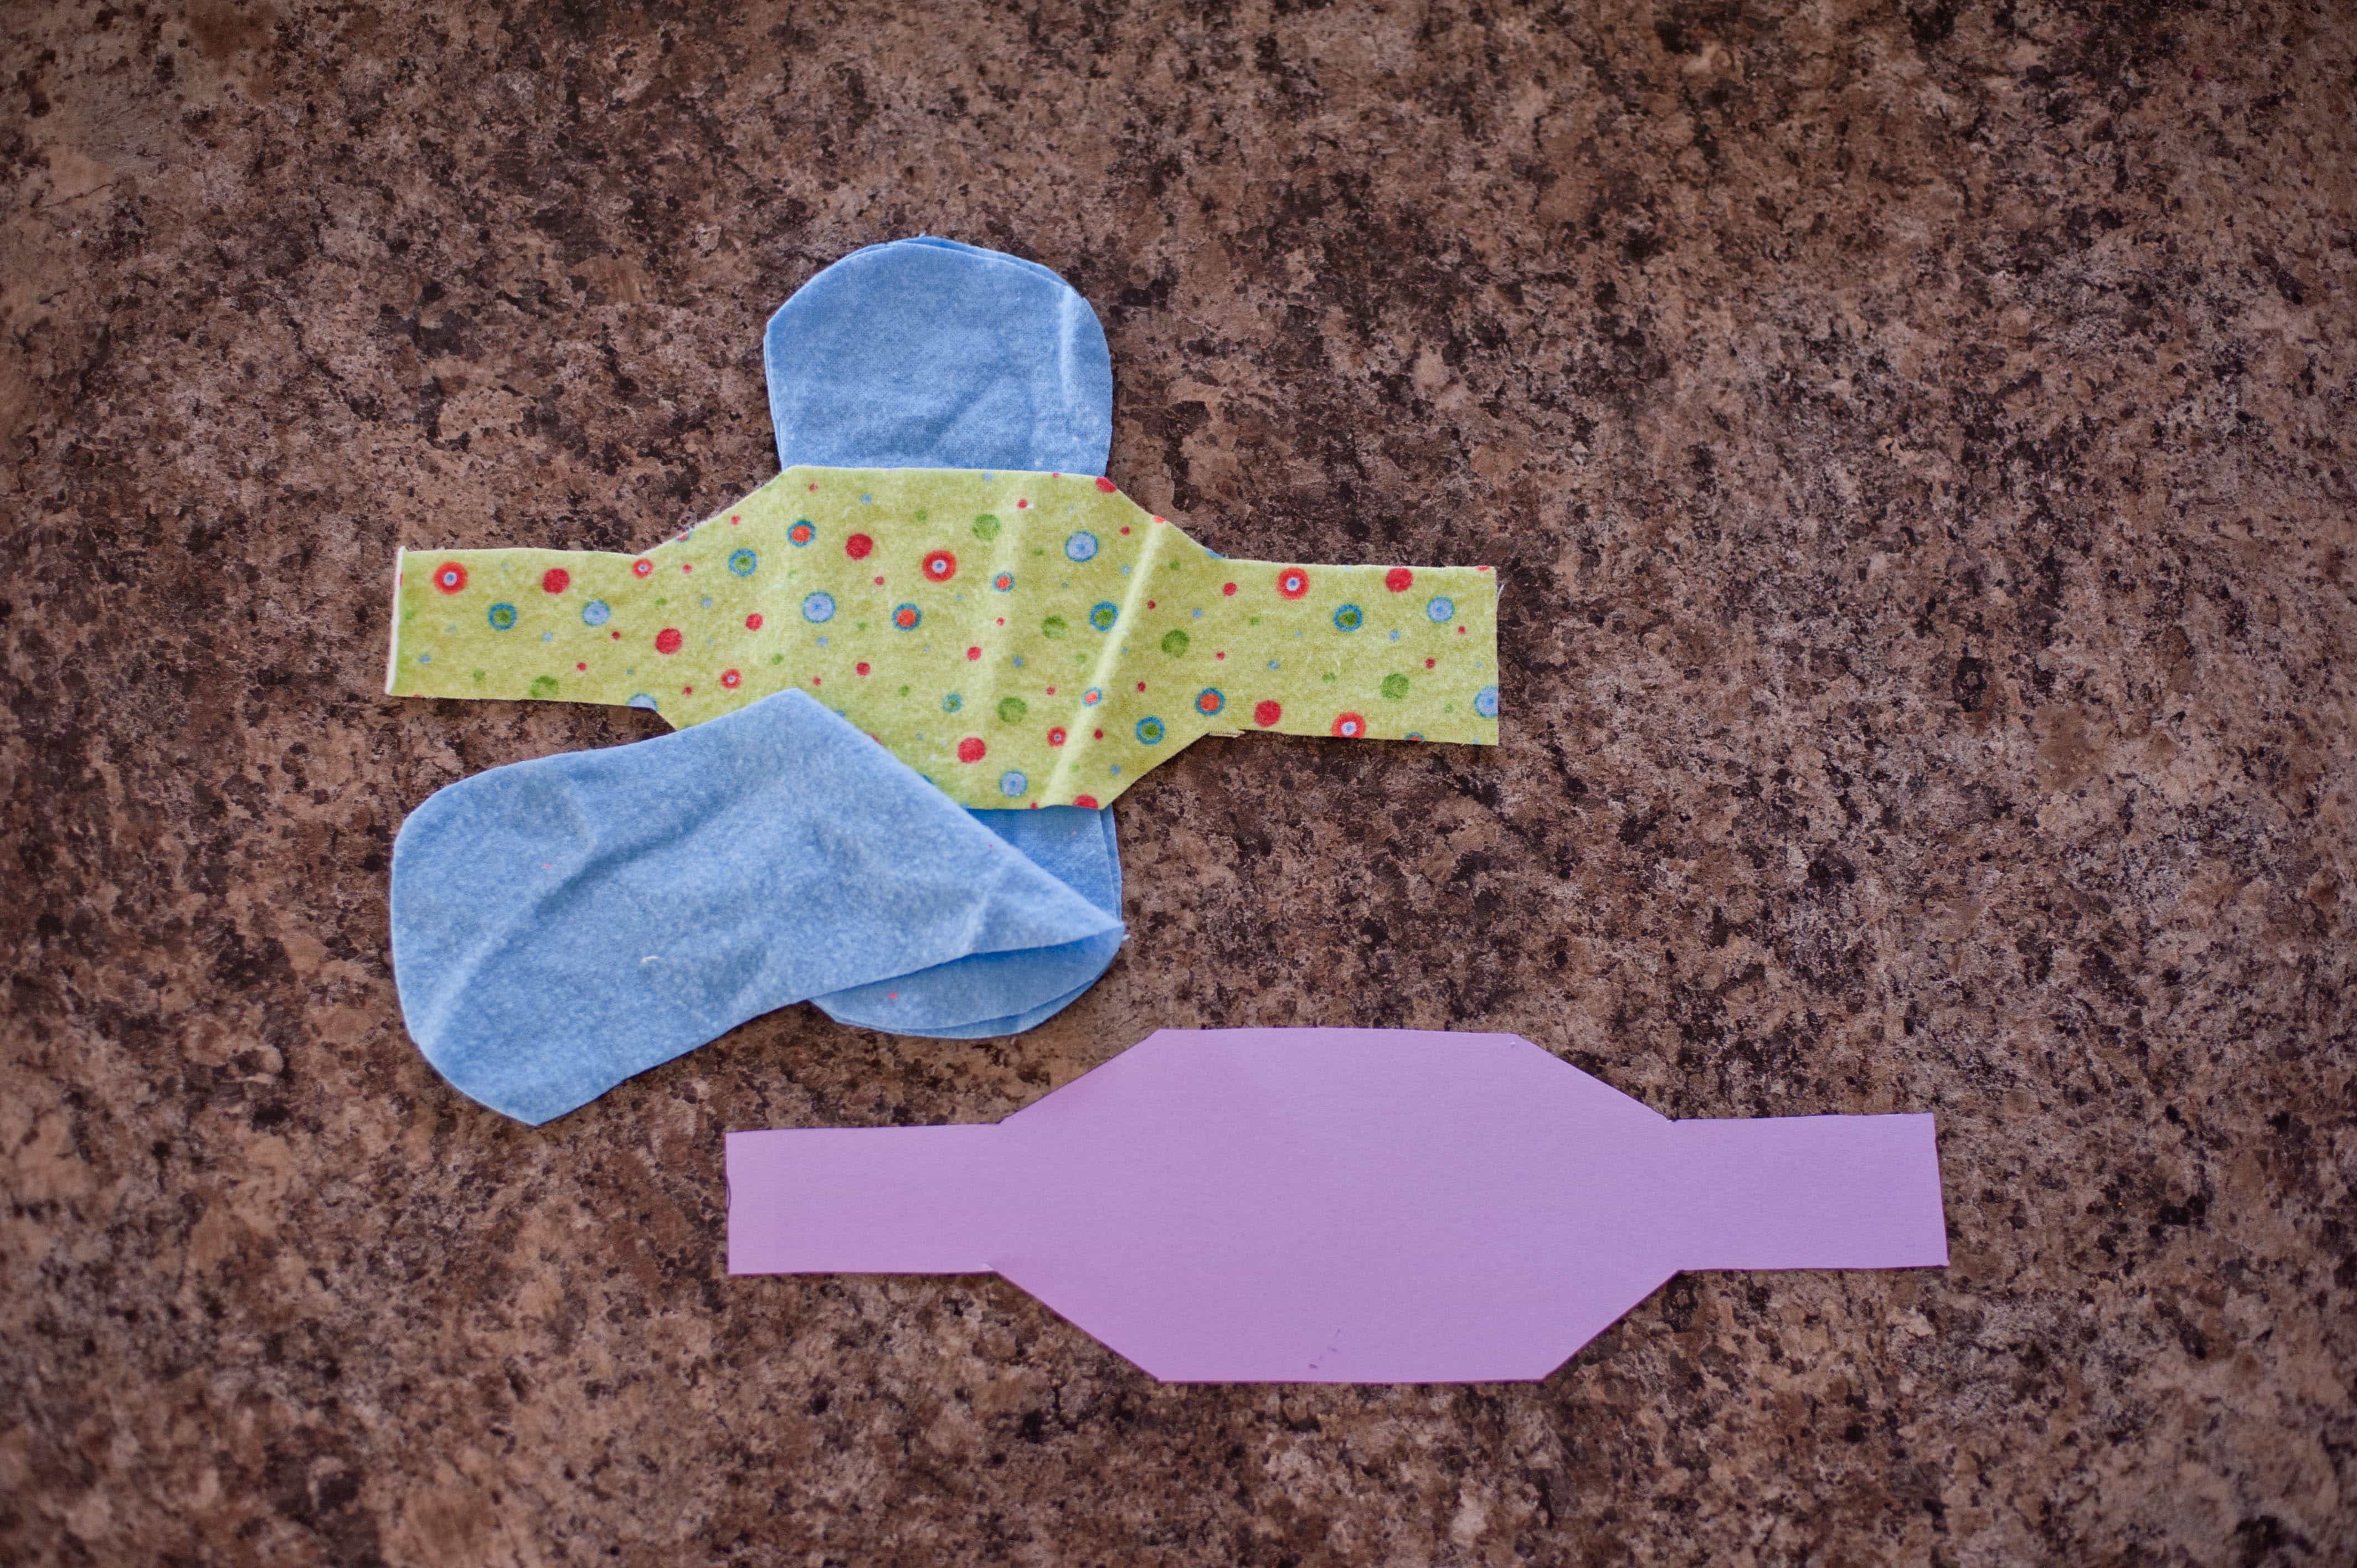
Choosing or Making a Pattern
There are patterns for sale and for no cost at all. An internet search will yield dozens of options. One link I found had more than a dozen different kinds and sizes on that website. After perusing those patterns and the styles available to purchase, I decided to make my own pattern. I figured I could use my favorite disposable liners as a template and make some adjustments (thinner, wider, longer) to the brands of underwear I buy. This process really did not take more than ten minutes, and when I was sure it was right, I made a copy to keep on cardstock. You could start with a pattern and adapt it, use it as is, or make your own as I did.

Sewing Methods
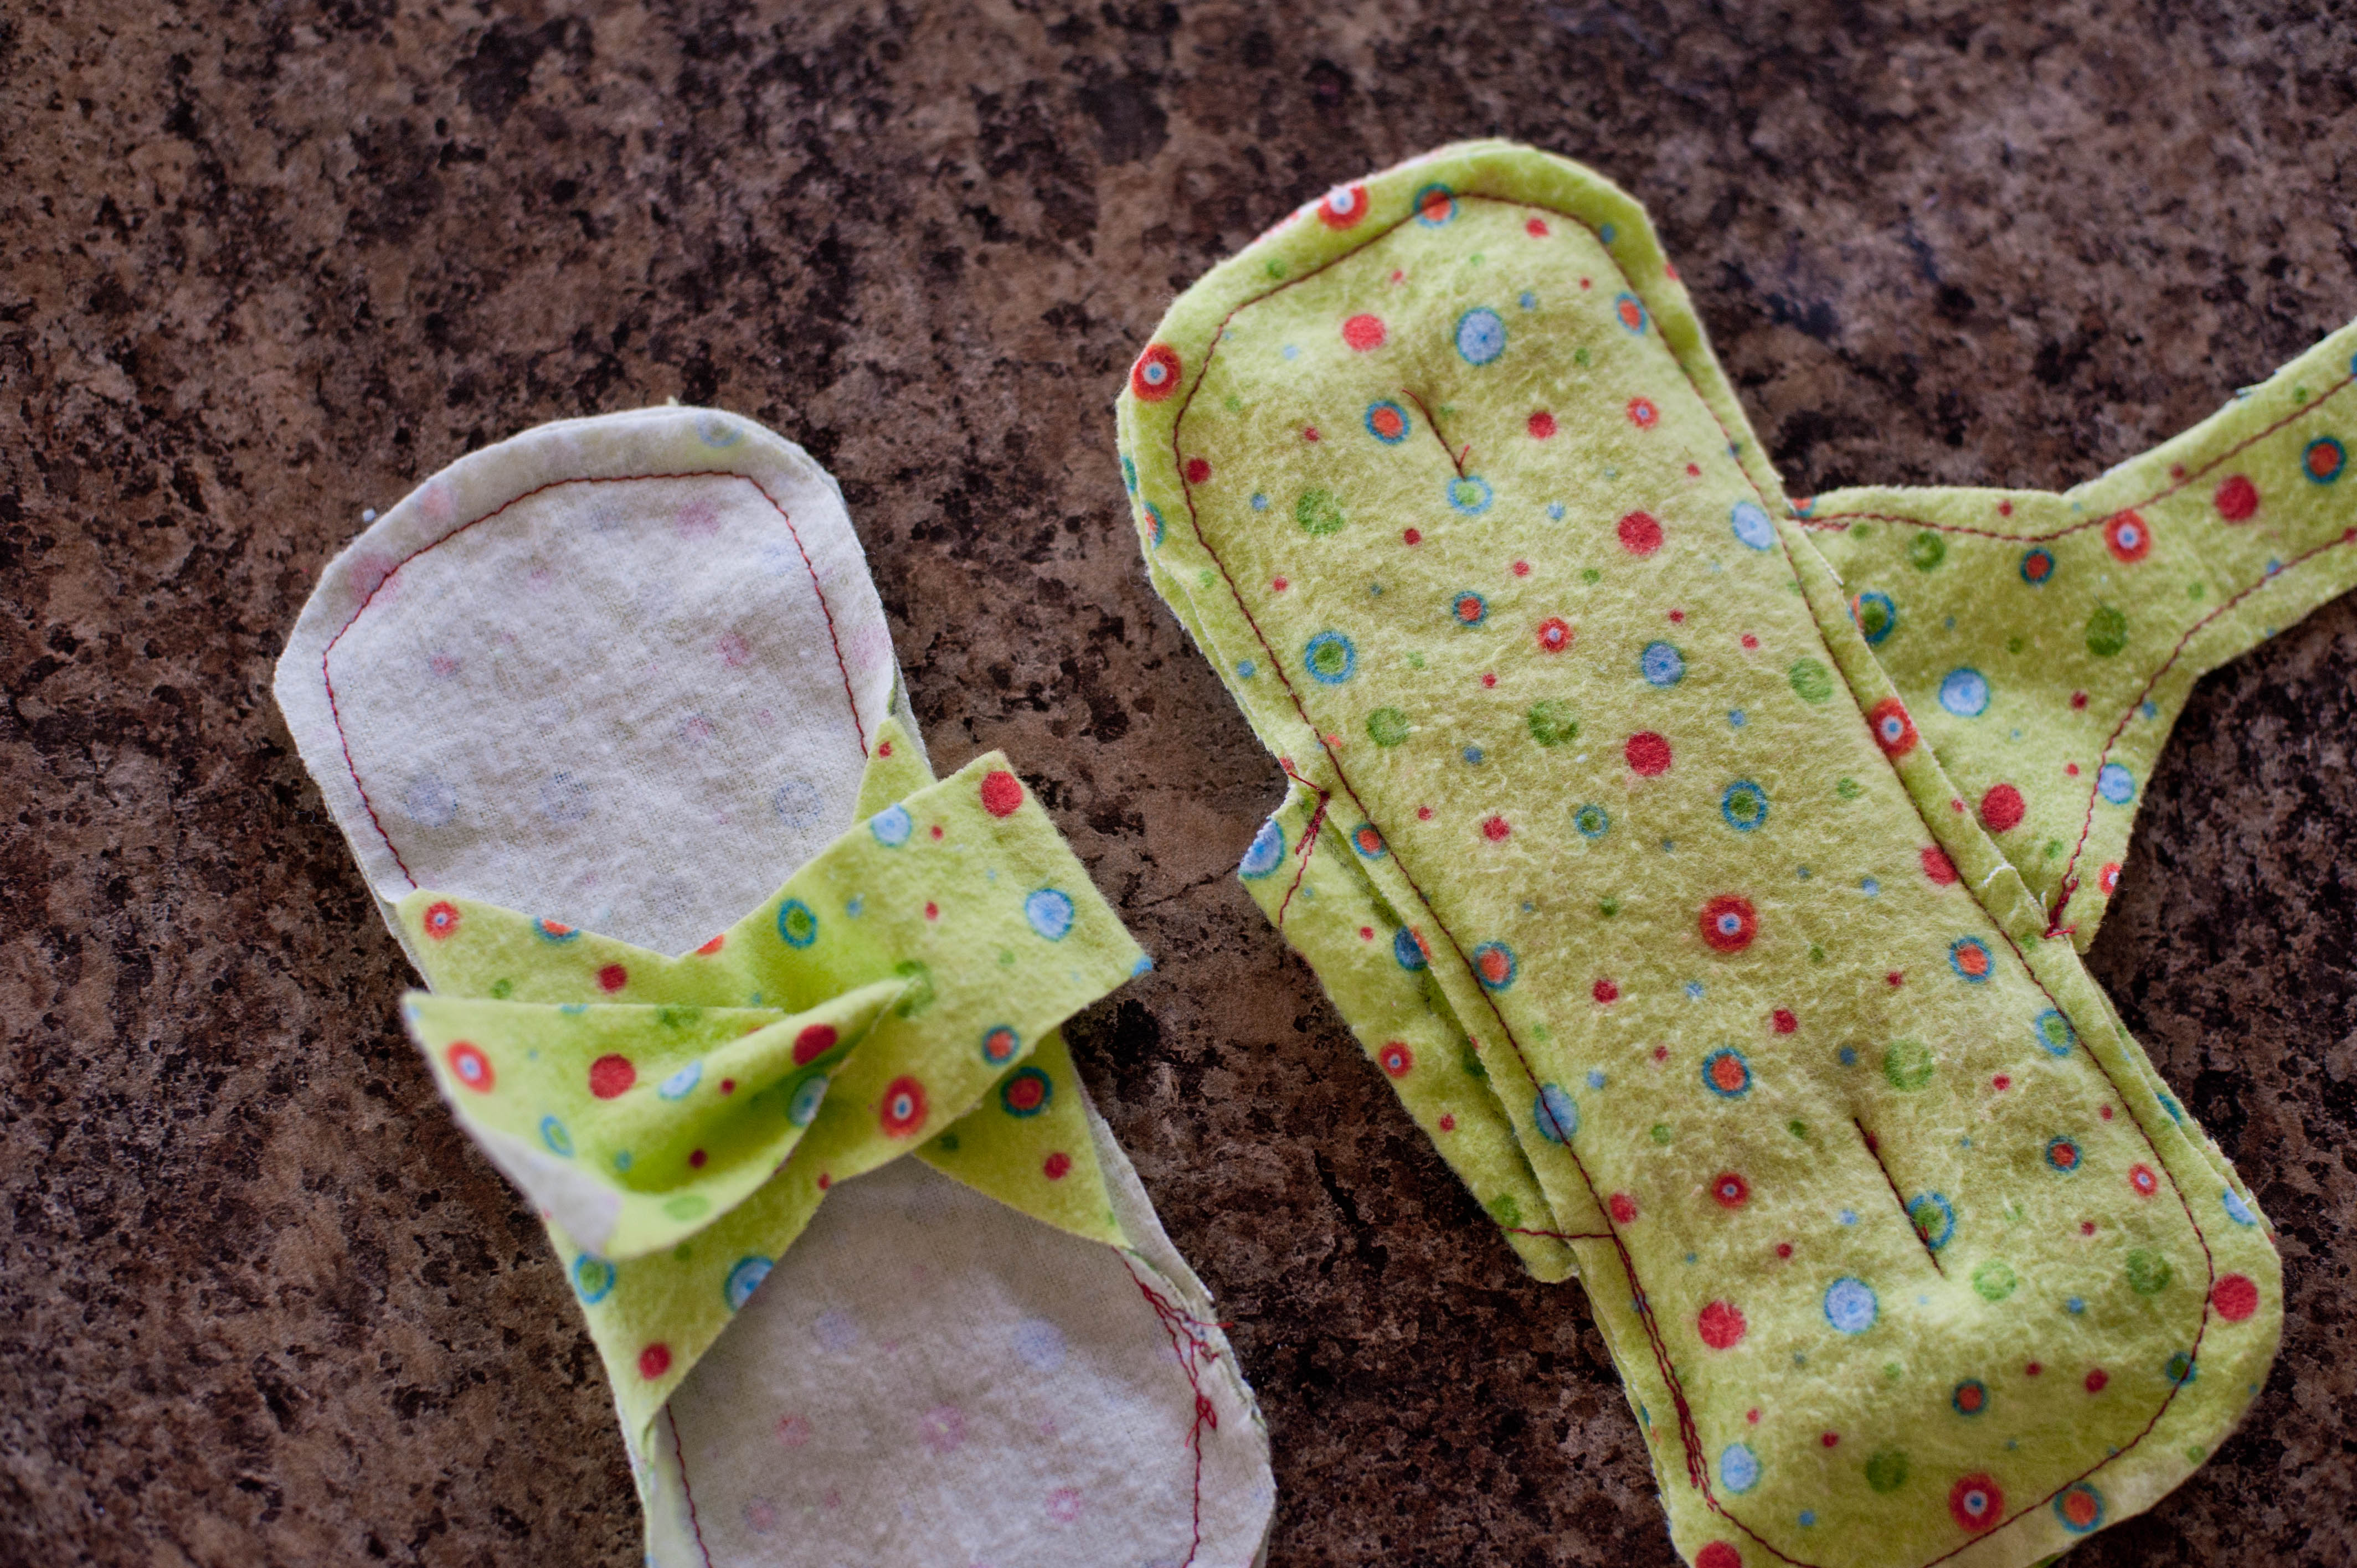
The basic idea of reusable pads is that you layer the fabric any number of times (2 layers for a liner, at least 6 for a thick pad) and sew them together. There are two basic styles of cloth pads: raw seams and closed-finished seams. The raw seams are sewn with the raw edge of the fabric on the outside rather than the inside. The finished seams involve sewing them together, leaving an opening, and turning the pad right side out. You then close the hole and finish off the edges.
Knowing they would be faster, I planned to start with raw seams and try to finish if that didn’t work. For the sake of experimentation, I tried one finished pad, which took me three times as long as the raw seamed version. I found that as the reusable pads are washed over and over, they shed the threads from the seams, which you can trim every few washes. After about half a dozen washes, the seam starts to fuzz, and there isn’t anything left to trim. I feel certain this method is worth the time it saves, especially considering the basic purpose of the pad.
One simple step that makes a big difference in securing the center of the pad with a line or two of stitching.
They do function fine without it, but you’ll spend a lot of time flattening them back out when they come out of the dryer. That quick extra step will save time in the end.
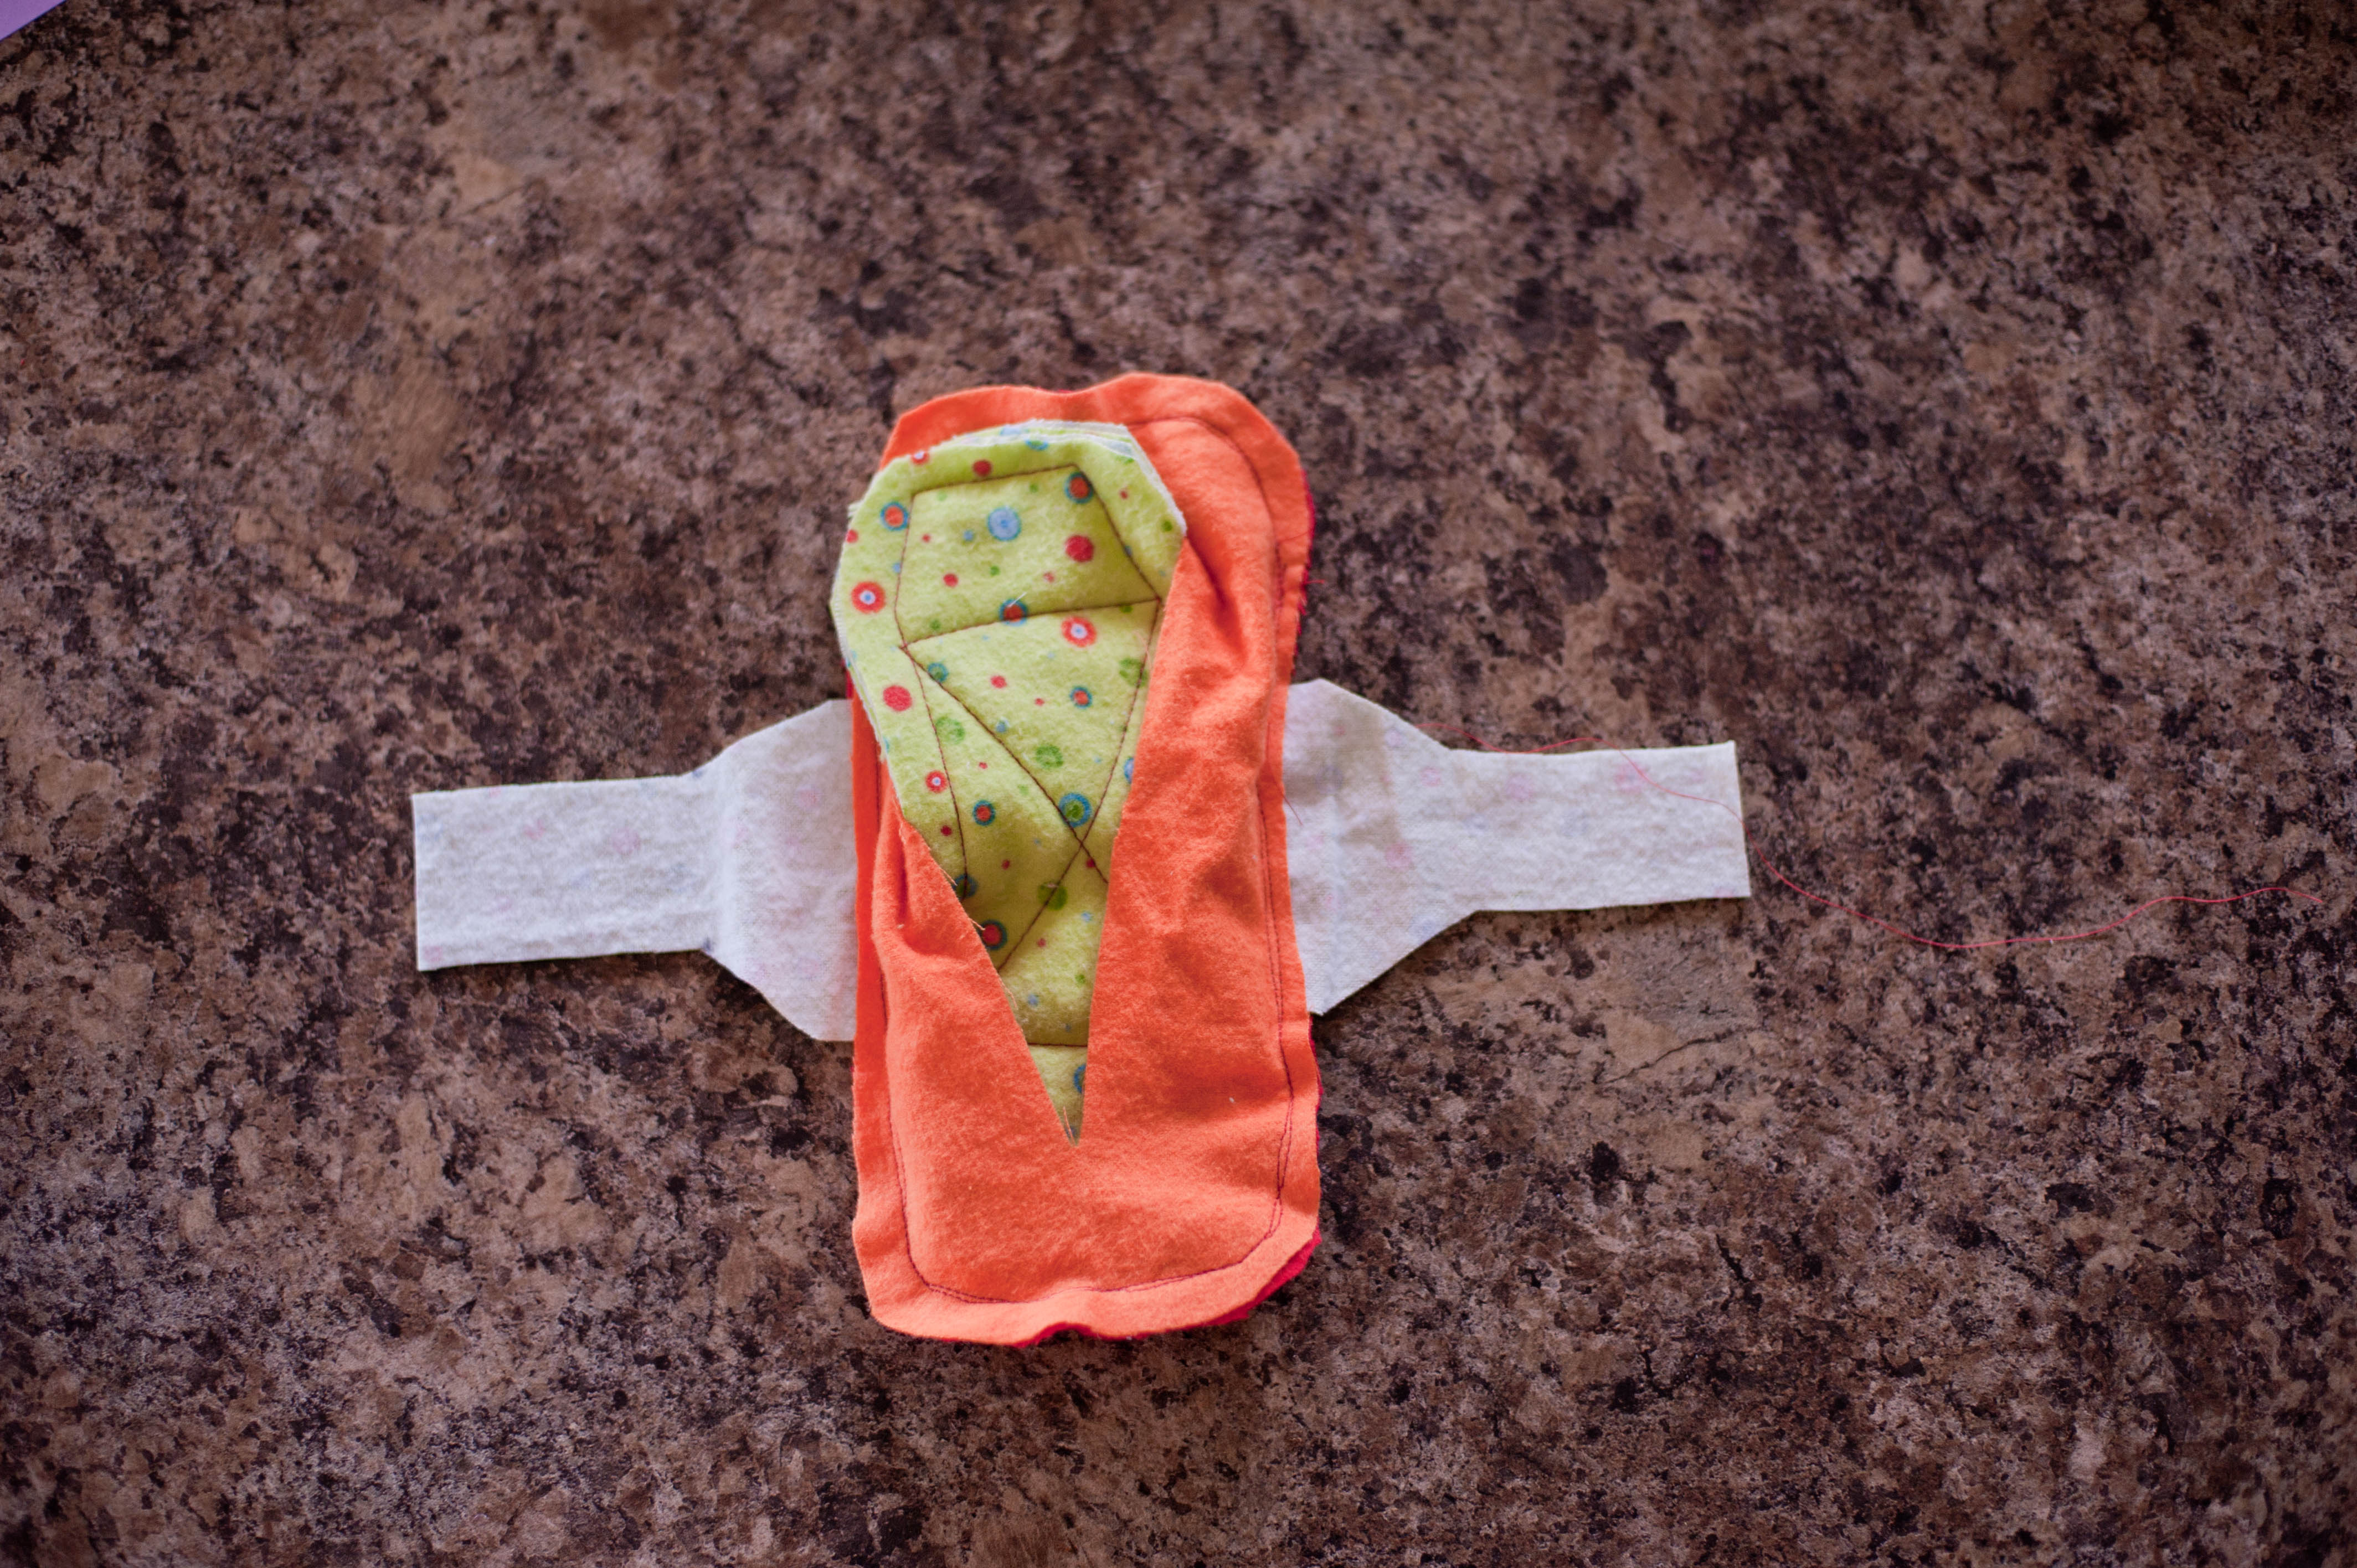
The one tricky piece that I haven’t fully decided on is the flaps to attach the pad. I started with a simple one-inch wide strip and found that while it held the pad on, it didn’t help hold it in place. It flopped and shifted as I wore it. The strip simply wasn’t working. I then took the strip and added “wings,” if you will. This shape seems to work better but does cause some issues when I choose to leave the seams raw and only use one layer. Raw seams need two layers to stop shedding and produce a fuzzy seam. I may decide to make a pattern that has flaps cut all in one piece with the main center panel (kind of like a rounded diamond shape) but that depends on the next issue I want to mention.
Methods to Attach
Now, this is the part where I got a bit lazy and cheap. And to be honest, I may change my mind about this choice. But remember, my goals don’t include spending a lot of time and money. Let me explain.
Snaps are the most popular method to attach. My issue with that method was the time they would take to install and the bigger issue of the expense. The snaps themselves only cost about .15 cents each, but the pliers to install them cost at least $20. I wondered if I could find a way to attach the pads with a small slit for one tab to pull through the other. It worked surprisingly well, and I’m thrilled that if someone really doesn’t have the income to spend much on making pads, there is a way to make it work without hardware.
I may not stick with it because I prefer a pad with a much wider, more secure wing. In that case, the pad looks like a rounded diamond shape, and the slit won’t work. If I decide to make them with a snap, I will certainly buy higher-quality flannel to ensure they last a long time. I want to live with the pads for a few months before I decide for sure.
A Note about Postpartum pads
It has been my experience that recovering from childbirth will bring a heavy flow like no other. This is going to require a bigger, thicker pad. Now, I am done bearing children, but because I am looking out for you girls, I decided to experiment with making a few simple pads that would function well for postpartum use.
The basic idea is still the same, layers of fabric sewn together with a wing-like flap to hold it on. But much like a cloth diaper, we need a way to add some absorbent padding that can be removed when it’s washed. The basic pad that will hold all this padding needs to be bigger than average to hold the padding and catch the heavy bleeding. Before sewing the layers together, I cut a long slit in the back layer, about 1 ½ inch from either end. I then sewed around the edge of this slit to make sure it wouldn’t unravel. Once the two layers of flannel and the wing piece were sewn together, I made a simple filler pad that was four layers thick. Two of these can comfortably be added to the outer pad.
This concept can also be used for a heavier menstrual pad with any number of needed and comfortable layers.
What’s Right for You
This issue of personal care is highly individual. Everyone’s situation and preferences are different.
Personally, I don’t care if these pads are pretty or look perfect, but someone else may prefer to spend the extra money and time to do that – and that’s ok.
You may find that some other materials, such as a minky top, waterproof backing, or wool filler, work better for you. Or you may prioritize materials that are organic and undyed.
As a new mom, I’m not sure I would have wanted to deal with fabric pads. If I had to do it over, my choice would have been a green, disposable product. But many new moms have had great success with reusable postpartum products, raving about how much they love them.
Or maybe you are thinking, “There is no way I want to spend the time making those.” Rest assured, there are dozens of options to buy at a number of price points. A quick search on Etsy or Amazon will yield dozens of options.
Finding the Right Product
Finding just the right natural feminine care items is no different than finding just the right disposable feminine care items. It’s a matter of trial and error, finding what works for you and fits your life. And while I will admit that there is a bigger investment in these reusable items, there are ways to make it work for you. Join together with some other women to try a variety of products. You can each buy or make a set of different style pads, sharing one for each person. If you choose to go with snaps, maybe you and a few friends can share the snap pliers.
As for me, I’m going to try my simple pads for a few months and then decide what and if any changes need to be made. Once I have exactly the pattern and process I want, I’ll make myself a large stock of them. I certainly have found that making them is worth my time and far easier than I expected.
Tell us about your experience! Would you consider making your own pads? Which reusable menstrual care products do you use and love?
| Krystal is a stay-at-home mom of four children, ages 4-9, whom she homeschools. She is acutely aware of how fast her children are changing and is passionate about keeping family memories alive through photographs. Now and then, she gets to help other families bottle up their own memories at Krystal Griffin Photography. | |