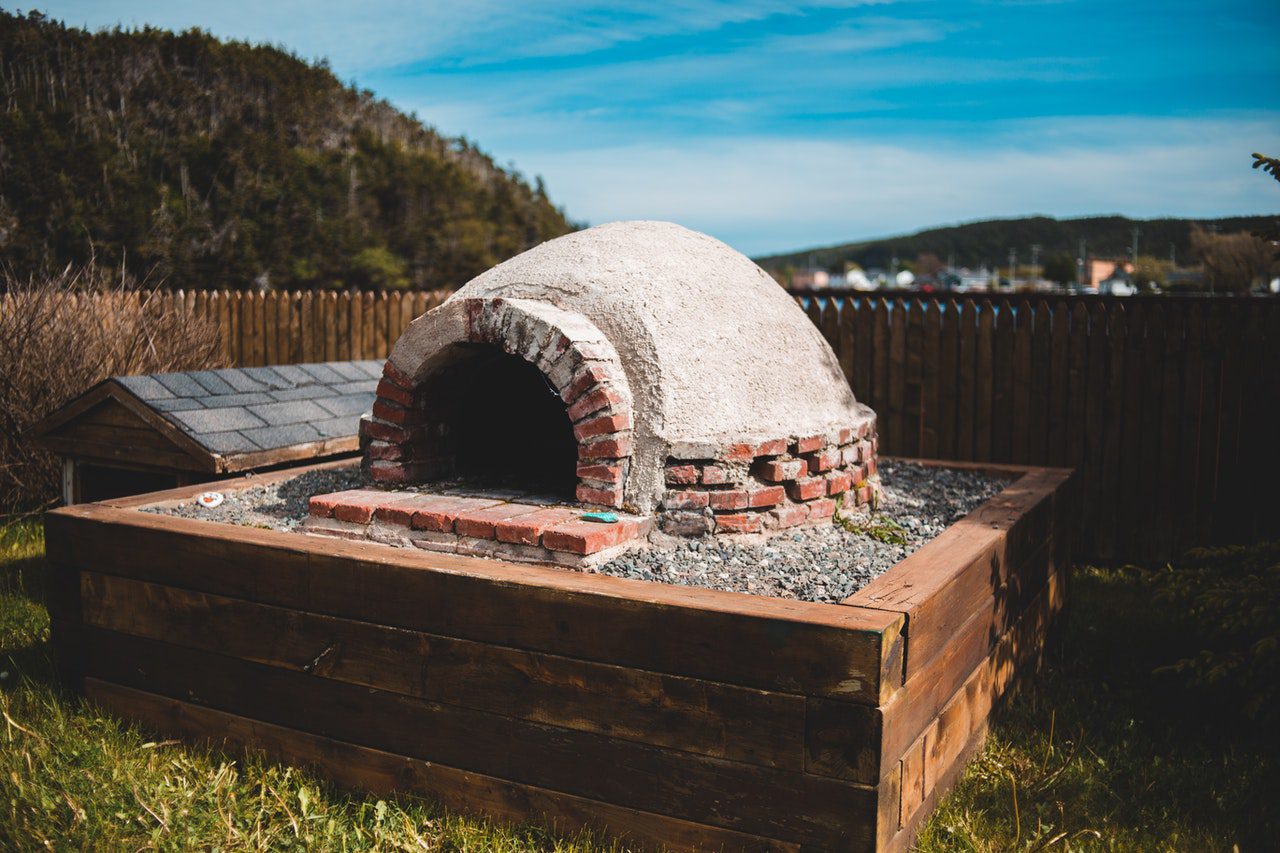
Are you a pizza lover? Then building an outdoor pizza or having a wood-fired oven should be fun for you. It is a relatively cheap project but requires your time and effort. Also, you need to be creative in this case so that you can end up building your outdoor pizza oven. If you have someone to help you do it, you are good to go. Otherwise, you can do it yourself, as well, because it is not rocket science.
However, through the article, I will share all the fun things I have gone through while building my own outdoor pizza oven. Therefore, you can also replicate or go on your own way to finish building an outdoor pizza oven. I will share some proven steps here that will lead you to build a pizza oven.
Wait for a second!
Before you enter your outdoor pizza oven-building process, ensure you have everything on hand for the purpose. Otherwise, you might take more time and get bored in the middle of the building process. Many people forget it and start right away and spend time searching for things that require completing it.
So, let’s make a checklist so that we don’t have to wonder what you have and what you don’t have at your hand, right?
Materials you will need
- Prickly sand (sand having aggregate in the mix)
- Cement
- Construction sand
- Aggregate
- Spade for mixing
- Trowel for brick lying
- Large cellophane sheet
- Bricks (ideally heat-resistant but not essential)
- You will need a chipboard if it is being built on wooden pallets
- Some old pieces of wood and foam for shaping the arch
- Drill
- Wooden pallet
- Wood Saw
- Wood Screws
So, you have everything you need to start. Some might say that you need heat-preventive bricks so the oven cannot get cracked. For my case, I have built my outdoor pizza oven using building bricks. The good news is that the pizza oven I made has no cracking issues. And I hope that you can also go with standard building bricks.
Step one: The Creation of Base
Building your outdoor pizza oven requires a flat surface to start. In this case, you might find it difficult because there may not be a flat surface in your backyard. But you have to make it leveled using wood pallets or digging the ground. Then you can add sand to the ground and use your leveler. You can do it yourself easily.
If you want to use wood pallets instead of sand on the ground so it can be a raised surface for the pizza oven, you can do it, too. To do so, make sure you have cut the wood pallets according to the measurement. If you want to speed up this process and make sure that you are doing it correctly, you can check out some sliding compound miter saws at The Tool Scout! It means that you have wooden pallets based on your outdoor pizza oven size.
Step two: Shaping the size
Before permanently fixing bricks with mortar, you should lay them roughly in the appropriate position. You can chop the house bricks so that you can make more shapes out of the oven. Then it should be the actual time to fix them with each other using mortar.
Step three: Arch creation
In this step, you need to make the oven arch that will allow you to use the pizza oven. It should be 2/3 the height of your oven’s entire size. Therefore, you can easily access the arch inside the oven. Whatever you find useful to make the arch, you can use it. For me, I have used layered cardboard to make the arch shape of the oven.
Now, all you need to do is put the house bricks on top of the cardboard one by one and add mortar to fit properly. After a few minutes, you will discover them joining each other tightly. When you are sure that removing the cardboard will not damage it, you can remove it.
Step four: Use cement to fix bricks
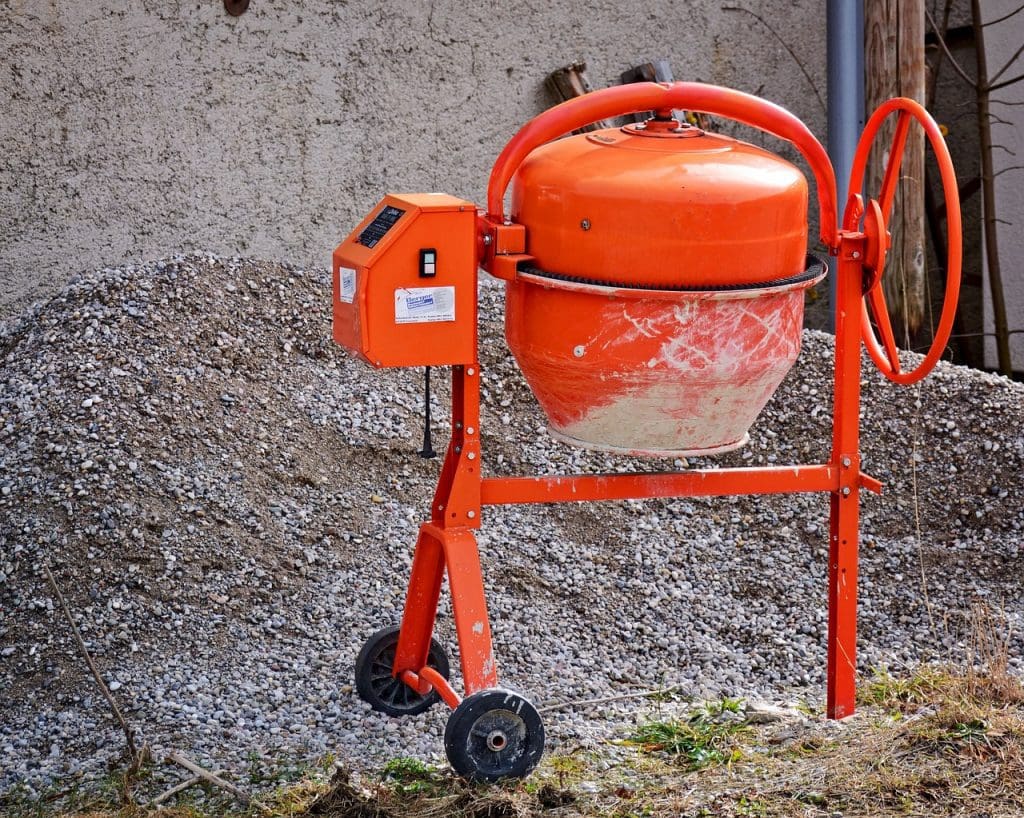
Use a ratio of 1:3 for sand and cement to make a fine mixture of them. In this step, after making the mixture of sand and cement, it is time to layer the house bricks so that they stay in place. In the same way, you need to layer up the bricks on the side of the cellophane sheeting.
Also, don’t forget to make a chimney through which the smoke will get out of the oven. It should not be hard work to do so. Make a small hole on top of the oven and use a cylindrical object utilized as a chimney.
Step five: Outer layer of the oven
It should be the easiest step for building a pizza oven because it requires almost no strategy to apply. All you need to do is mix some concrete with sand and cement and spread the mixture outside the oven. It might look a bit uneven, but enough for the step to finish.
Step six: Eradicate chipboard and sand
When you remove all the supports like cardboard and sand just after a couple of days, you will end up building your pizza oven. While removing all these things, be careful because you might damage the oven if you do it fast.
Step seven: Make a small fire before starting

Create a small fire inside the pizza oven to see whether it works well. Look at the chimney and whether the smoke inside the oven is getting out. Also, the fire will dry the oven, and you can inspect if there are any cracks in the oven.
Also, you can try making a little pizza for the first time! Get creative and try different types of pizza, like a fruit pizza.
Final Thought
Building an outdoor pizza oven should be fun, right? It takes time but helps you to be more creative. However, I hope that the step-by-step process of building your pizza oven will help you do it for yourself. If you follow all these steps, you can successfully build one for yourself. Maybe your next project will be to create an outdoor kitchen.
Featured Photo by Erik Mclean from Pexels